Binary Clock Android App In Scala Part 1 Build a binary clock Android application in Scala - Part 1
Introduction
Let’s make a binary clock for Android using Scala just for fun!
Scala has limited support on Android, documentation is lacking and almost non existent so I made this is step by step walkthrough guide that will hopefully clarify how to overcome the major hurdles of starting out with Scala on Android.
As you can see, a Binary-coded decimal clock is an alternative way to represent time.

This tutorial will show how to build this app using Scaloid.
What is Scaloid?
Sung-Ho Lee, the creator and maintainer of the project describes it as :
Scaloid is a library that simplifies your Android code. It makes your code easy to understand and maintain by leveraging Scala language.
Getting the code
Let’s start by cloning a template project from Scaloid.
$ git clone git@github.com:pocorall/hello-scaloid-sbt.git
There are a few other options than SBT, either using Maven or Gradle but after trying out all of these options with different combinations of IDEs, I really recommend going with the SBT version for now, even though this may change in the future.
Then, I’ll rename the project directory to something more appropriate.
$ mv hello-scaloid-sbt binary-clock
And move into the project directory.
$ cd binary-clock
I’ll get rid of the old git files since and start another git project from scratch with a clean commit history.
$ rm -rf .git
$ git init
$ git add .
I will also assume that you already have the Android SDK set up and installed with your environment variables correctly defined along with SBT the official tool used to build traditional Scala projects.
Fighting with SBT and setting up the environment
Let’s change the project name by editing the build.sbt file using vim or your favorite text editor.
This is what my build file looks like for now :
import android.Keys._

javacOptions ++= Seq("-source", "1.7", "-target", "1.7")

android.Plugin.androidBuild

name := "binary-clock"

scalaVersion := "2.11.4"

proguardCache in Android ++= Seq(
  ProguardCache("org.scaloid") % "org.scaloid"
)

proguardOptions in Android ++= Seq("-dontobfuscate", "-dontoptimize", "-keepattributes Signature", "-printseeds target/seeds.txt", "-printusage target/usage.txt"
  , "-dontwarn scala.collection.**" // required from Scala 2.11.4
)

libraryDependencies += "org.scaloid" %% "scaloid" % "3.6.1-10" withSources() withJavadoc()

scalacOptions in Compile += "-feature"

run <<= run in Android

install <<= install in Android
Now lets run sbt for the first time, this step can actually take a long time since it takes care to downloading all the necessary dependencies for your Scala project.
$ sbt
If for some reason you get a similar error,
[error] set ANDROID_HOME or run 'android update project -p /Users/dontbelievethebyte/IdeaProjects/binary-clock'
[error] Use 'last' for the full log.
then you will need to set up your PATH and ANDROID_HOME environment variables correctly.
In order to do that, just add the appropriate entries either in your .bash_profile or .bashrc file located in your home directory filling out the information matching your system’s specific location where the Android SDK is installed.
export ANDROID_HOME=/Applications/android-sdk-macosx # Adjust this to match your install directory.
export PATH=${PATH}:$ANDROID_HOME/tools:$ANDROID_HOME/platform-tools
You will either need a fresh terminal or to log in again in order for the changes to take effect.
Confirm that the correct variable is set with the following command :
$ echo $ANDROID_HOME
/Applications/android-sdk-macosx
If you ran sbt without any dramatic error, you can test that the APK building process is working by running the command.
$ sbt android:package
or if you’re already inside the sbt prompt.
android:package
My build failed the first time because of this error.
[trace] Stack trace suppressed: run last android:platform for the full output.
[trace] Stack trace suppressed: run last android:builder for the full output.
[error] (android:platform) Platform android-10 unknown in /Users/dontbelievethebyte/IdeaProjects/binary-clock
[error] (android:builder) java.lang.IllegalStateException: failed to find target android-10 : /Applications/android-sdk-macosx
[error] Total time: 30 s, completed 11-Feb-2015 7:21:08 PM
Following the stack trace, we can deduce how to solve this issue by installing the Android SDK version 10.
Let’s fix this by firing up the sdk manager and installing the older version of the sdk, this can later be changed to an up to date version from editing the manifest, but we’ll use the default values from the template for now.
$ android sdk
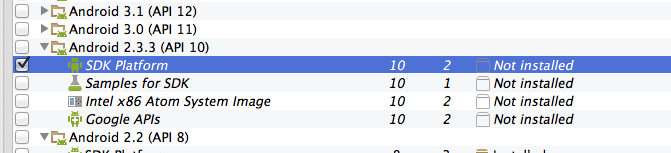
After your system has successfully downloaded and installed the SDK version 10, you should see a check mark confirming its presence.

With this in place, trying again to build an APK using sbt ended up with success!
And by taking a look into the project files under ./bin, you will find the generated apk.
Let’s try to install it and run it from a connected device using the adb command line tool.
$ adb install bin/binary-clock-debug.apk
3400 KB/s (192785 bytes in 0.055s)
    pkg: /data/local/tmp/binary-clock-debug.apk
Success
Now if you go on your device, you should see a new application icon.
Opening it will show something similar to this :
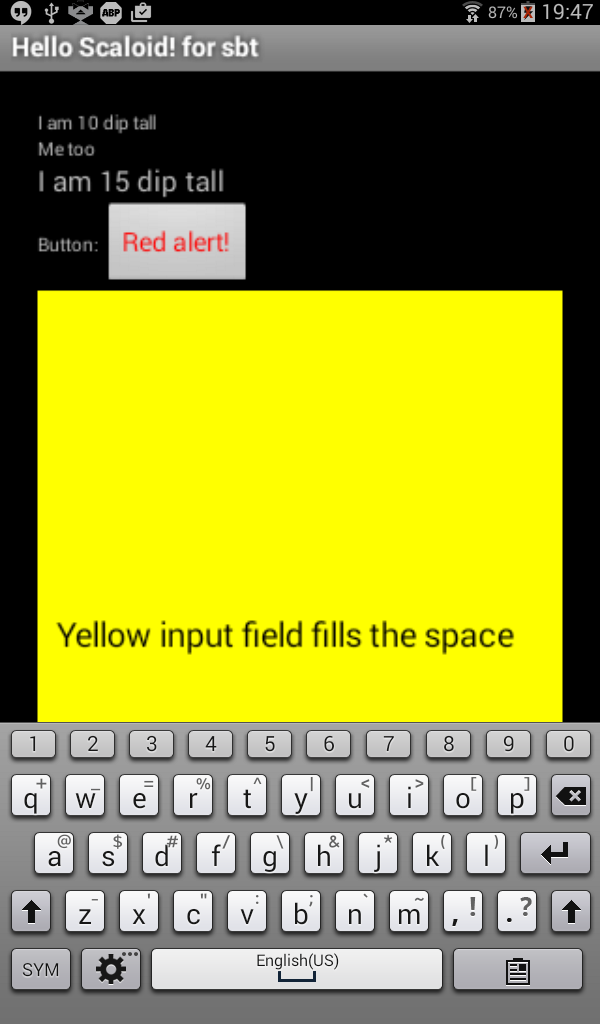
This is very good news!
Don’t worry, we will customize everything from the look and feel to the core functionality soon, but first, let’s make sure IntelliJ has everything we need to code for Android in Scala.
Setting up IntelliJ IDEA
IntelliJ IDEA will need the following plugins :
- Android support
- SBT
- Scala
Make sure to install them before moving on and restart IntelliJ for the changes to take effect.
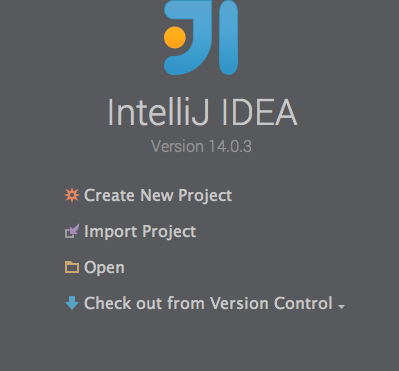
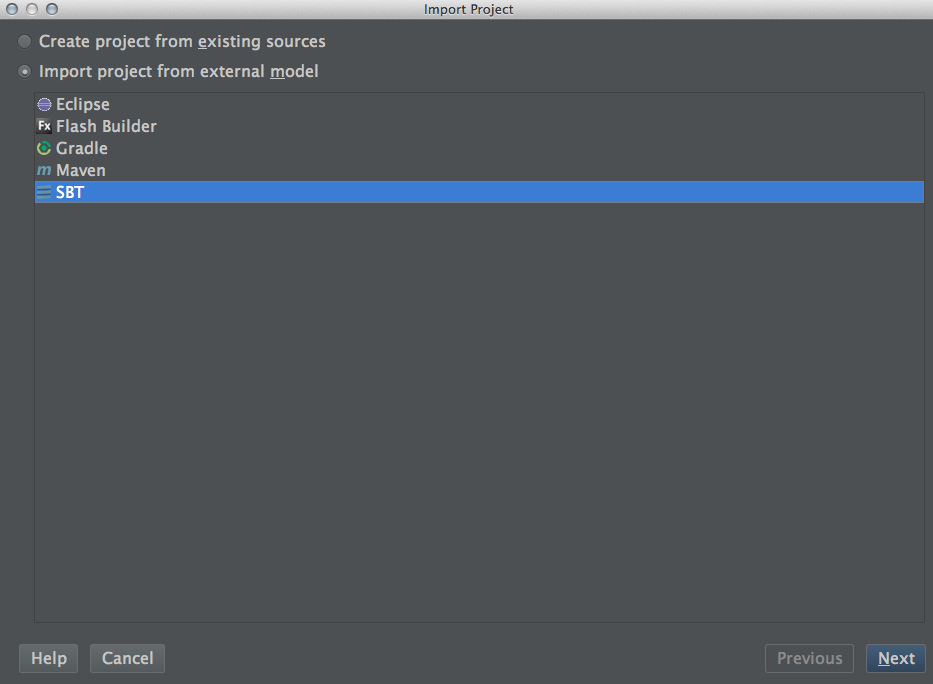
Next, from the main window, let’s import a project.
And there it is, just click OK.
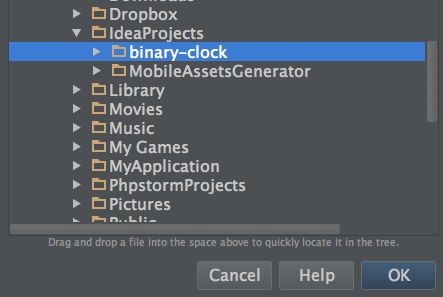
It’s important to import from an external model using SBT.
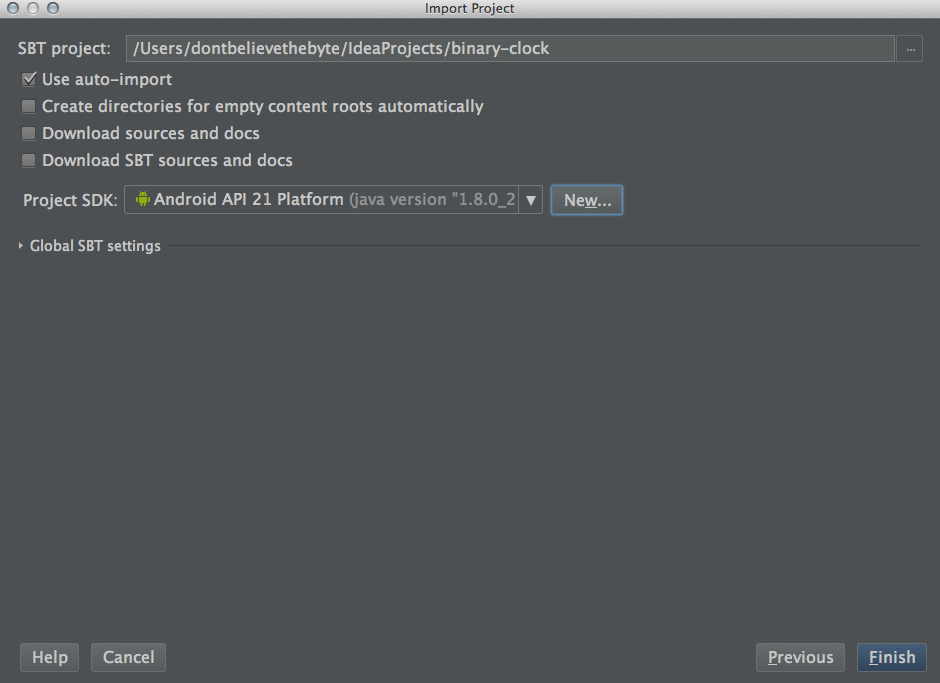
From the next screen, make sure that “Use auto-import” is checked and also to select the Android API for the Project SDK otherwise the IDE will fail to see Android specific features and you’ll be stuck with regular Java and click finish.
Fix imports
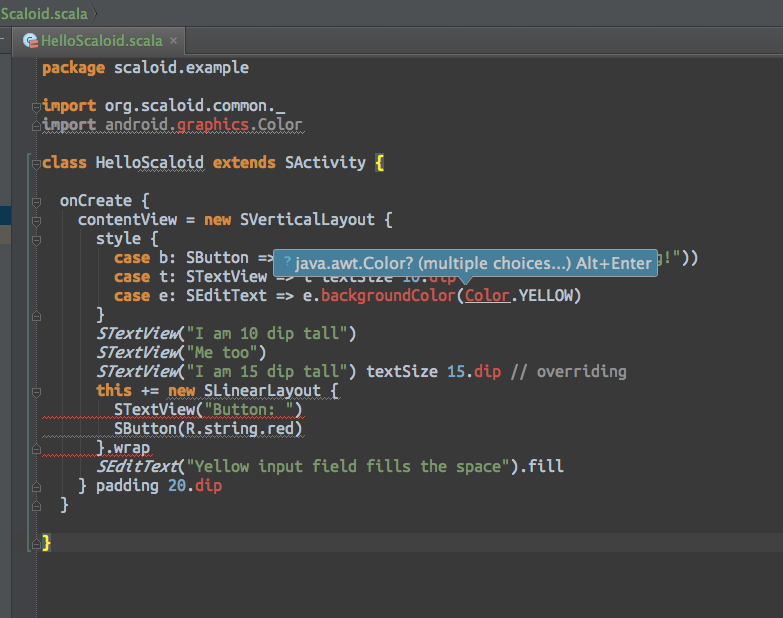
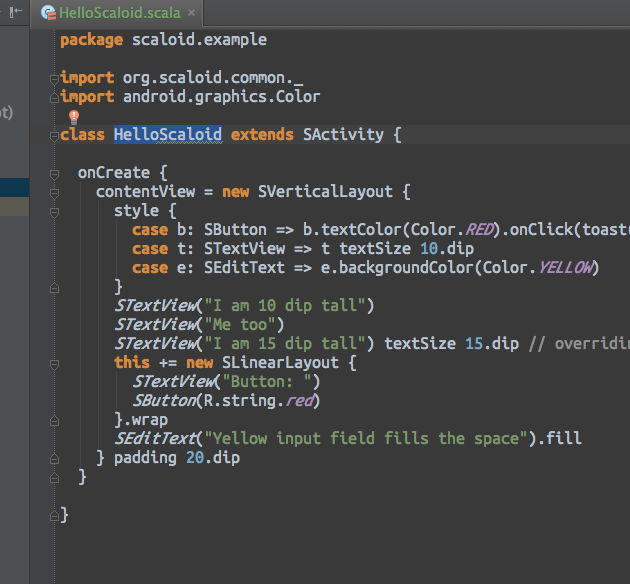
By taking a quick look at the HelloScaloid Activity, it seems there are still import problems despite selecting Android.
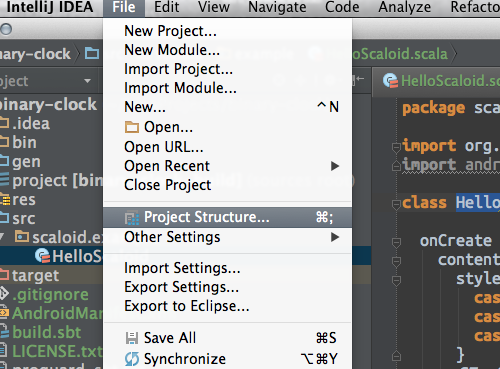
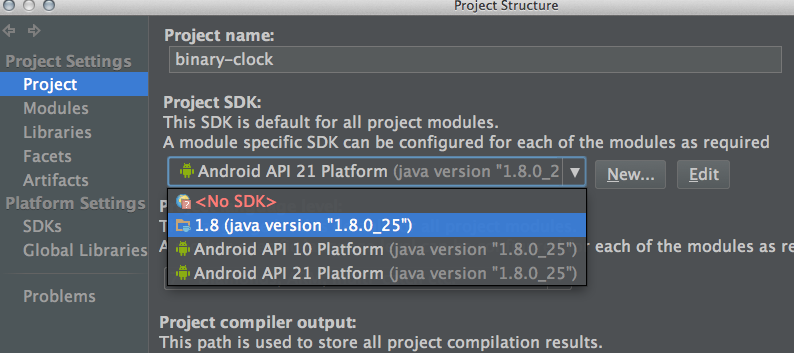
I solved this by going to the file menu and selecting project structure.
From there, I changed the SDK to Android. If you don’t find the Android SDK from the menu, select it by navigating where your $ANDROID_HOME is located and using this directory as the target.
And voila! The Android framework is recognized, we’ll have code completion and auto-imports for relevant classes.
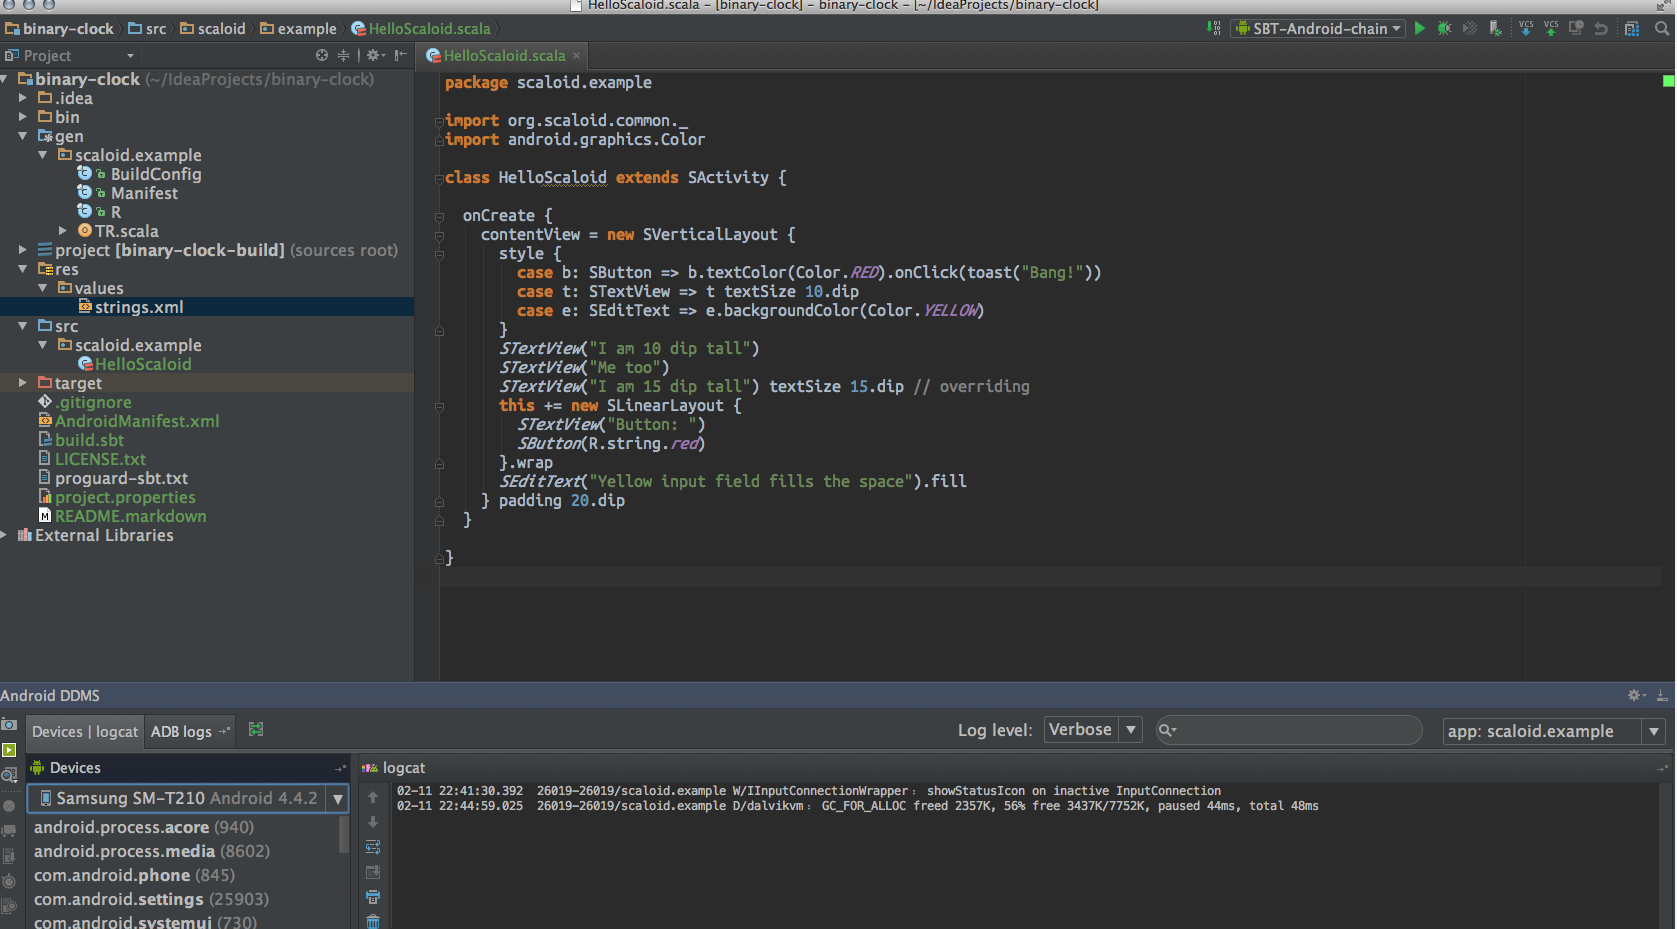
Building and running from IntelliJ
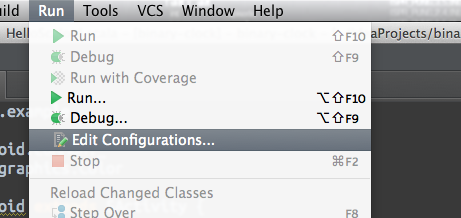
If you now try to run the application, nothing relevant will come up, so let’s edit the configuration and make sure everything is built in the right order.
I will start by defining a new SBT task so it looks something like this (disregard the VM parameters that probably need some adjustment).
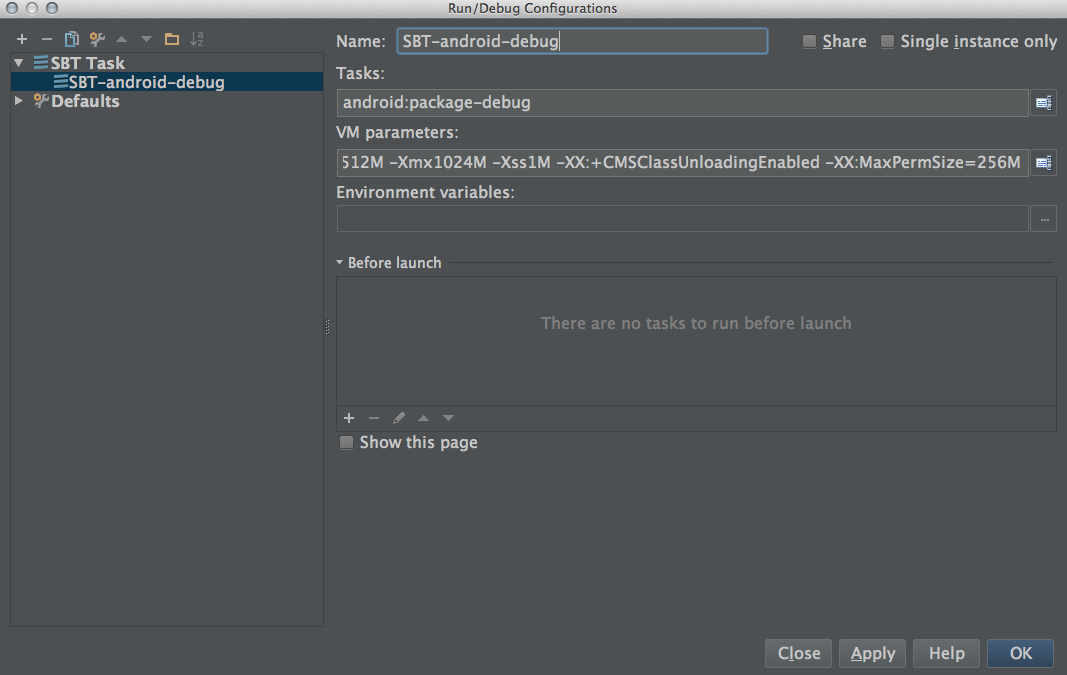
Now let’s try to run the new build configuration.
And it compiles without errors!
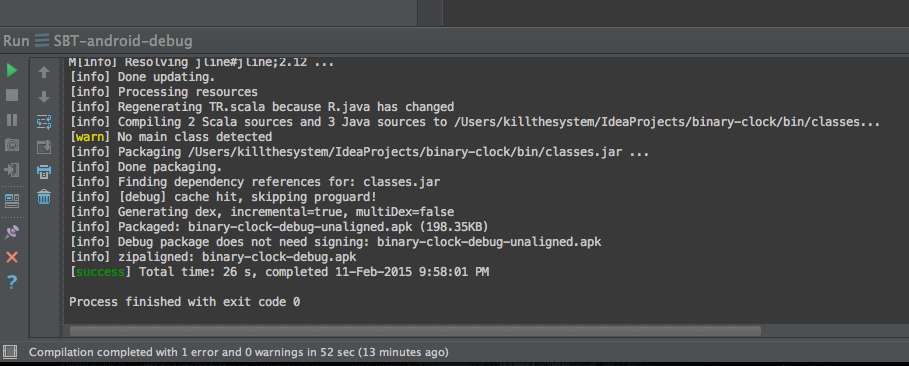
But even though an apk is generated, it doesn’t take care of installing it and the normal Android device dialog doesn’t appear.
Wouldn’t it be nice if we could hook into the regular Android dialog, get automatic apk installation and debugging?
Let’s do this!
I will edit the run configuration again.
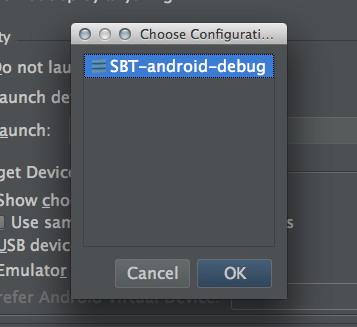
And define a new Android build configuration that I will call SBT-Android-chain.
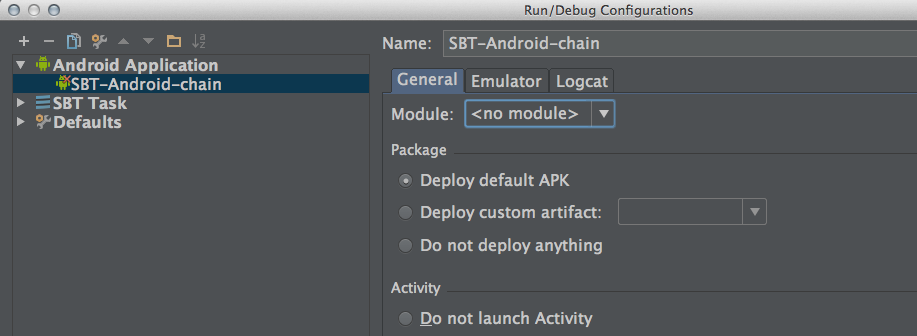
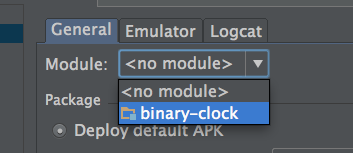
It’s mandatory to choose a module, so I select the appropriate one matching the current project.
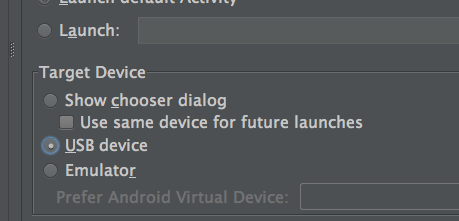
I prefer to test and debug over USB on a real device but leave the emulator option if it suits you.
In the before launch panel located at the bottom.
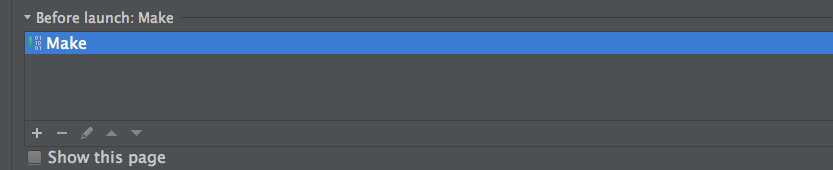
Make needs to be removed. Then click on the plus icon and select Run another configuration.
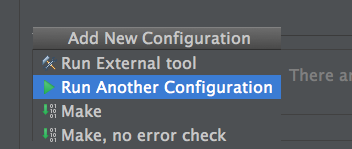
Now select the previously defined SBT configuration.
The final configuration should look like this. Click Apply and OK.
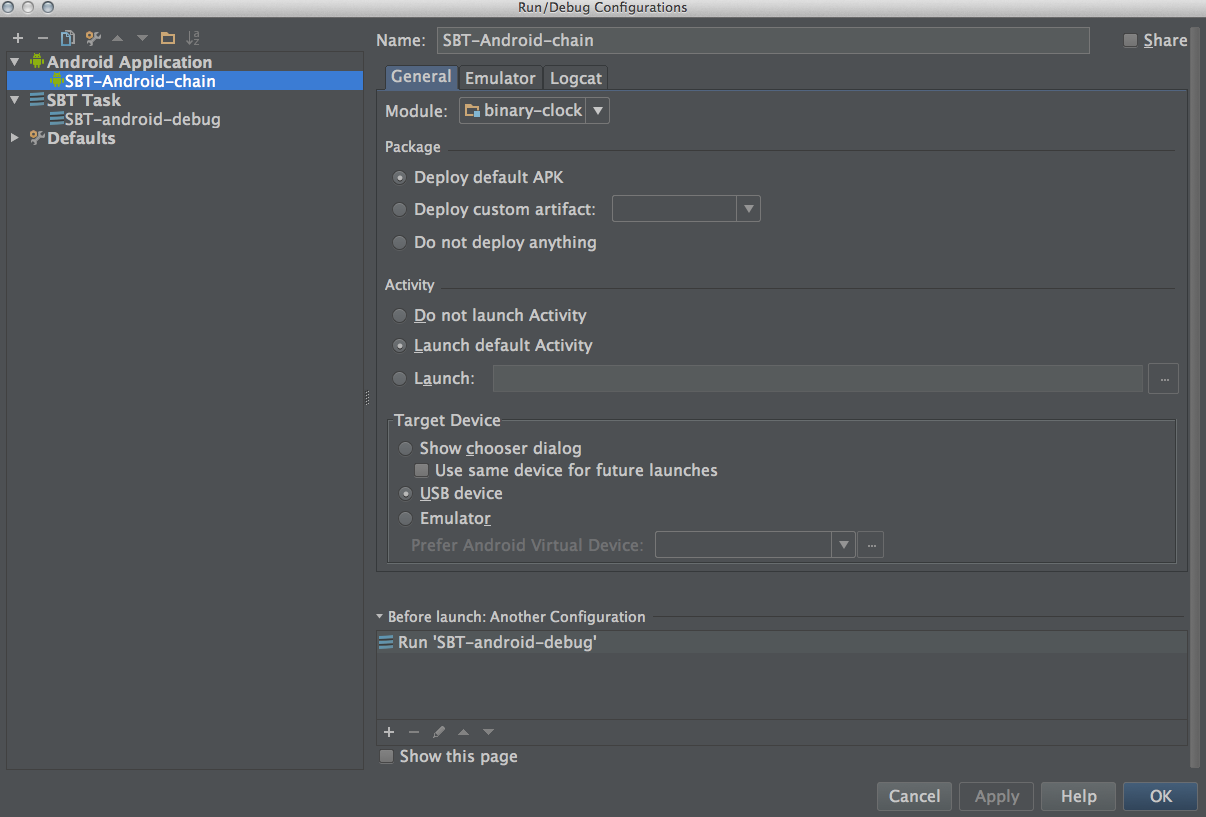
You can just run SBT-Android-chain config from now on. It will execute the SBT configuration first and will then upload to your connected device or emulator like it normally would.
Return 0
That’s it for now.
In part 2, we will start customizing and building the actual application by cleaning up the project files and defining a layout using Scala instead of XML.
blog comments powered by Disqus